

How to build your first chrome extension with p5.js?
p5.js is a powerful open-source JavaScript library to built some creative projects with JS.

I am a FrontEnd Developer from India exploring my way in ReactJs.
Chrome extensions are programs that are made to run within web browsers.
Extensions can add additional functionality to a browser by adding new features, providing tools for various use cases and modifying the functionality of web pages.
In this article, we will build a beginner-friendly Chrome extension called Doodly that can be used to doodle on web pages. We will achieve this using JavaScript and p5.js which is a Javascript library that provides a full set of drawing functionality.
Let's first see what are some of the important parts of a Chrome extension.
manifest.json
The manifest file is the first thing that you create for an extension. It consists of all the properties, configurations and information about the extension. It's very similar to package.json which we have in node.js to describe our project configs.
So to start with let's create our manifest file with the basic idea of our extension.
//manifest.json
{
    "manifest_version": 2,
    "name": "doodly"
    "version": "0.001",
     "content_scripts":[
        {
             "matches":["<all_urls>"],
             "js":["p5.js","p5.dom.min.js","content.js"]
        }
    ],
    "browser_action":{
        "default_icon":"icon.png",
        "default_popup":"/popup/popup.html"
    },
    "background":{
        "scripts":["background.js"]
    },
    "permissions":["tabs","activeTab","storage"]
}
Let's see what each config means here:
"manifest_version": This is nothing but the API version provided by Google. The latest is 3 which comes with added features like service workers but since we are building a basic extension here, I think version 2 also works perfectly.
"name": Name of your extension
"version": Versioning the extension as it helps keep track of development.
"content_scripts": These are the JS scripts that will run immedialtely when the extension loads in the context of the browser. The "matches" key here is to define on which urls you want your chrome extension to be running.
"browser_action": These can be used to put in a default icon for the extension, or add a popup when clicked on the extension icon.
"background scripts": This is the script that runs in the background when a Chrome extension loads. It listens to all the activity that's happening on the web page. Using this, we can listen to a click of a button on the page and make things happen like show a popup or change the look and feel of a webpage etc.
Now, to include p5.js in the project, download p5.js and p5.dom.min.js from my GitHub repo.
Now let's create a background script that will run every time our Chrome extension loads.
// Add listener for the browser action
chrome.browserAction.onClicked.addListener(buttonClicked);
chrome.runtime.onMessage.addListener((message,sender,sendResponse)=>{
    window.tabId = sender.tab.id,
    window.configs = message.configs
})
function buttonClicked(tab){
const msg ={
    message : "clicked"
}
chrome.tabs.sendMessage(tab.id, msg);
}
Here, we just add a simple listener whenever the user clicks on our extension icon. This message will be sent to our content script which is where the code for p5.js lies. Whenever we receive this "clicked" message in the content script, we will execute our doodling function to enable the doodling behavior on the web page.
In the content.js file, we have startDoodling function, which has three main steps, first, we setup our canvas which is the entire web page.
  sketch.setup = function () {
    document.body.style["userSelect"] = "none";
    const height = document.body.clientHeight;
    const width = document.body.clientWidth;
    const canvas = sketch.createCanvas(width, height);
    canvas.position(0, 0);
    canvas.style("pointer-events", "none");
    sketch.clear();
  };
We have set the height and width of the canvas as the clientHeight and clientWidth. Then we create our canvas with these dimensions. One thing to note here is, we set "pointer-events" as none because, without it, you won't be able to click anything in the background when the extension is enabled.
Next is the draw function, which describes the stroke's properties.
sketch.draw = function () {
    const color = configs ? configs.color : "black";
    const width = configs ? configs.width : 4;
    sketch.stroke(color);
    sketch.strokeWeight(width);
    if (sketch.mouseIsPressed) {
      sketch.line(sketch.mouseX, sketch.mouseY, sketch.pmouseX, sketch.pmouseY);
    }
  };
In this function, we have a configs object, which comes from the popup.js file. The popup folder describes the UI and functionality of the popup that opens up when you click on the extension. It looks like this:
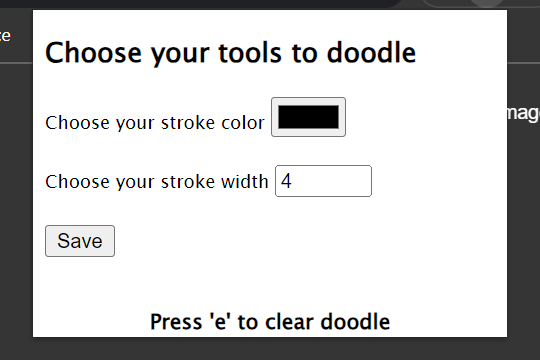
As we can see, you can choose the stroke color and width. Once you click on save it will draw the doodle with those specifications.
I hope you got a basic idea of how to build an extension now. Now, let's see how to add it to our browser. Now, here I am just going to do it for local use but if you want to publish your extension, you can do so on the Chrome web store.
So, to load an unpacked version of the extension follow these steps:
Go to chrome://extensions.
Click on Load unpacked.
Select the folder where your doodle code lies.
And then you should be able to see your extension added to your browser.
Click on the extension icon, and you will see your popup come up.
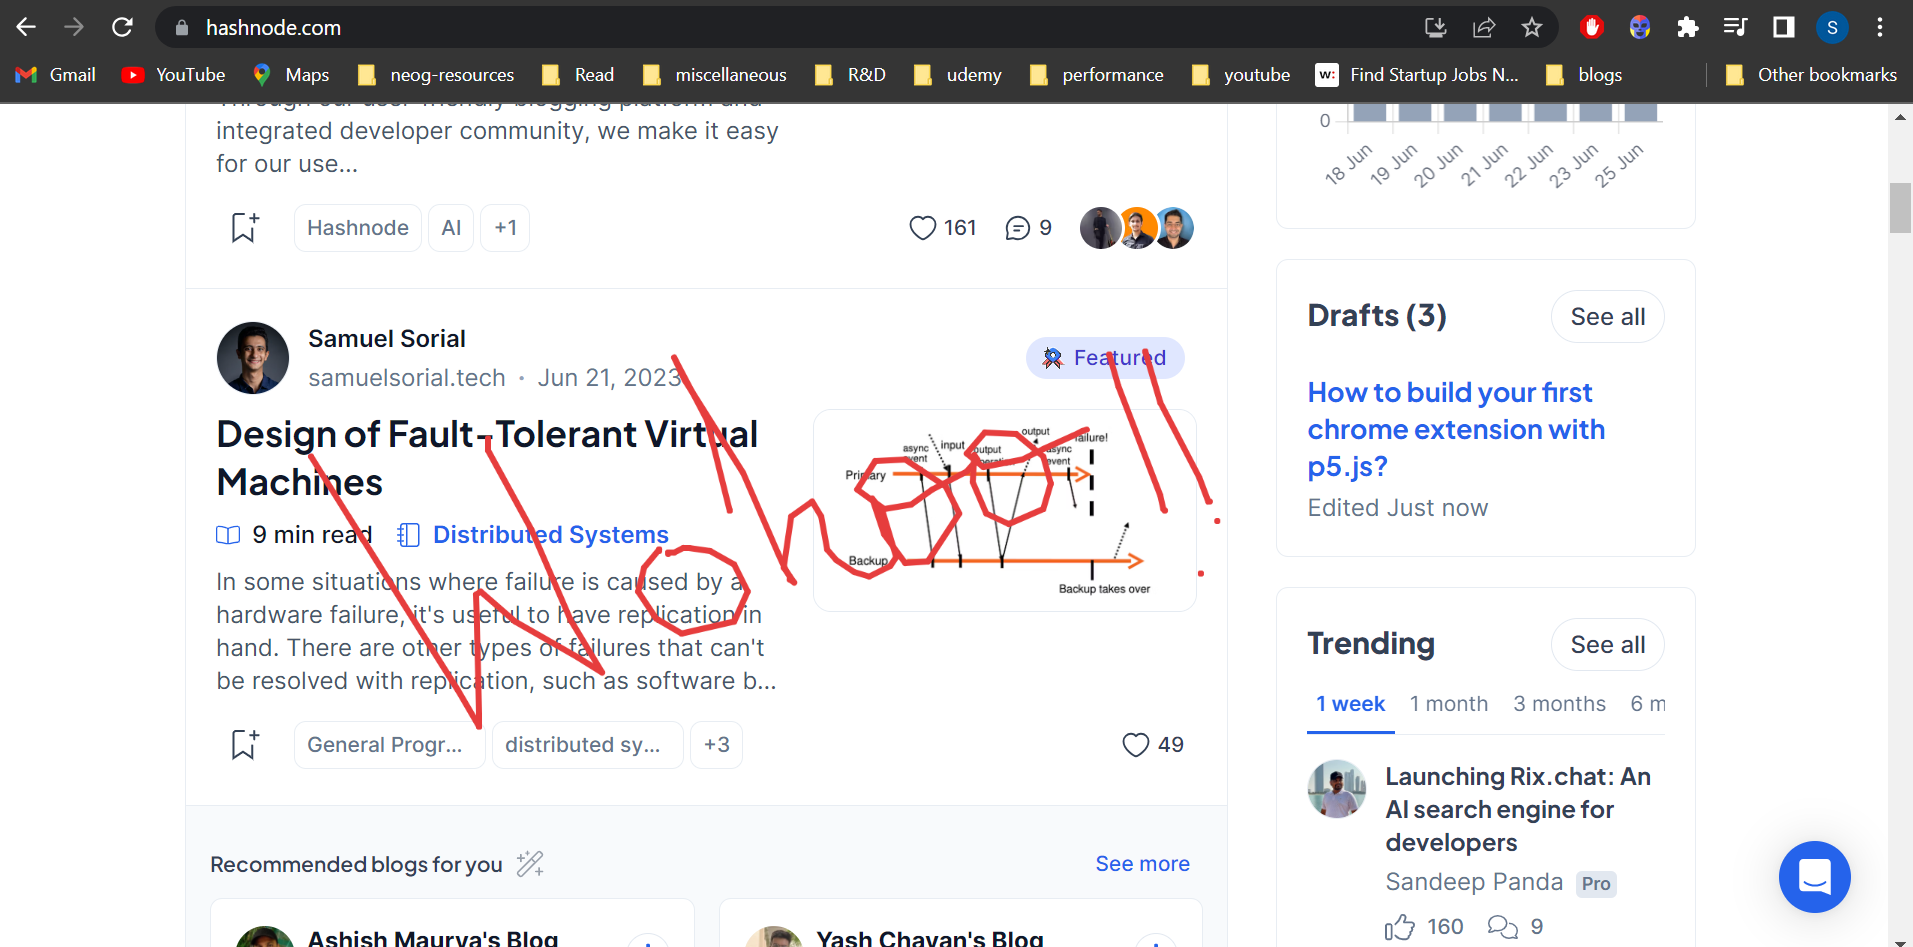
Select your stroke configs and start doodling!!
This is how it will look if you start doodling on any webpage:
Note: In case you face any error, to debug your code lying inside content.js, just go to the web page's console. But if you want to debug background.js code, then you need to click on the background page option on the Chrome extension setting.

That's it, folks!!
If you create any fun extensions using p5.js please feel free to tag me or share the GitHub links in the comments.
I hope you find this article informative and fun. If so, please leave a like and your comments to appreciate it.
Thank you for reading!!


